SafeGraph’s Canada Places (Essential Columns) dataset is available for free in the AWS Data Exchange. To use this POI data to conduct a market analysis, follow the steps below.
Getting Started
1. Sign up for an AWS account if you don’t have one already.
2. Setup two Amazon S3 buckets. You can create S3 bucket through your AWS Console. Since SafeGraph Places – Entire Canada (Essential Columns) is currently hosted in AWS Region us-east-1, to avoid any unnecessary data transfer cost, it is recommended for you to create your S3 buckets in the same region. You can leave the other default setting unchanged.
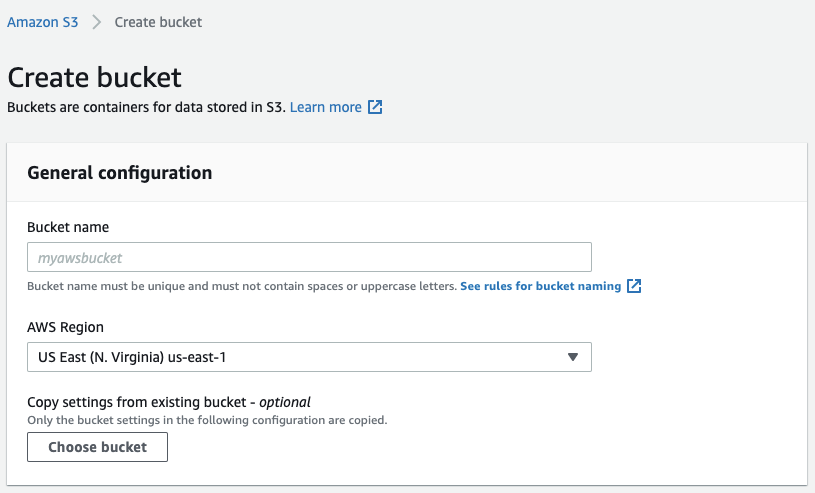
The first S3 bucket will be used to copy over the dataset from SafeGraph Places – Entire Canada (Essential Columns). The second S3 bucket will be used as the Athena query output. Athena is a server-less query engine with pay-per execution. Athena uses an S3 bucket to store its query result.
3. Request subscription to Free POI Data: SafeGraph Places – Entire Canada (Essential Columns) through your AWS Data Exchange Console.
4. Wait until your subscription is approved. You will receive an email notification and have access to it directly through AWS Data Exchange Console left navigation panel “my subscriptions” > “entitled data.”
Accessing SafeGraph Data
5. To start working with your dataset, first you need to export it to your own S3 bucket which you created previously. You can do this by choosing Free POI Data: SafeGraph Places – Entire Canada (Essential Columns) > Data set: SafeGraph Places – Entire Canada (Essential Columns) > (any available revision). Since we are interested in a single file, we can select “export selected assets to Amazon S3.”
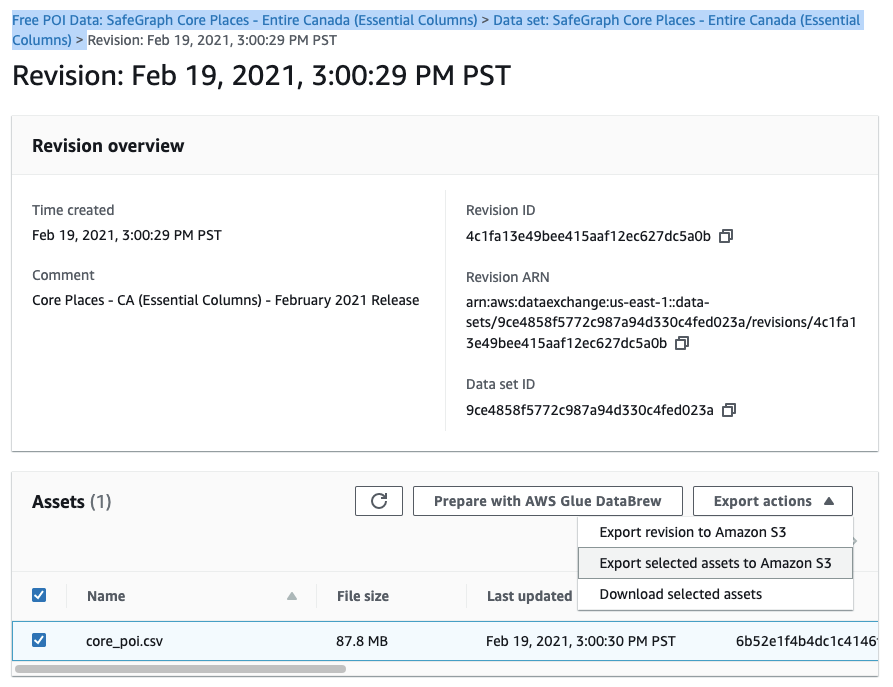
6. In the dialog box, choose the first S3 bucket you created in the previous steps, and confirm it by clicking the “export” button.
7. You can view the progress and completion of the export job in the “jobs” table list at the bottom of the page. After the state turns into “completed”, you can start working with the dataset.
Query with Amazon Athena
8. To easily query your SafeGraph Core Places – Entire Canada (Essential Columns) data, you can use Amazon Athena which gives you a SQL interface to query the dataset.
9. You can use the SQL query editor and view the result directly from your AWS Console – Amazon Athena.
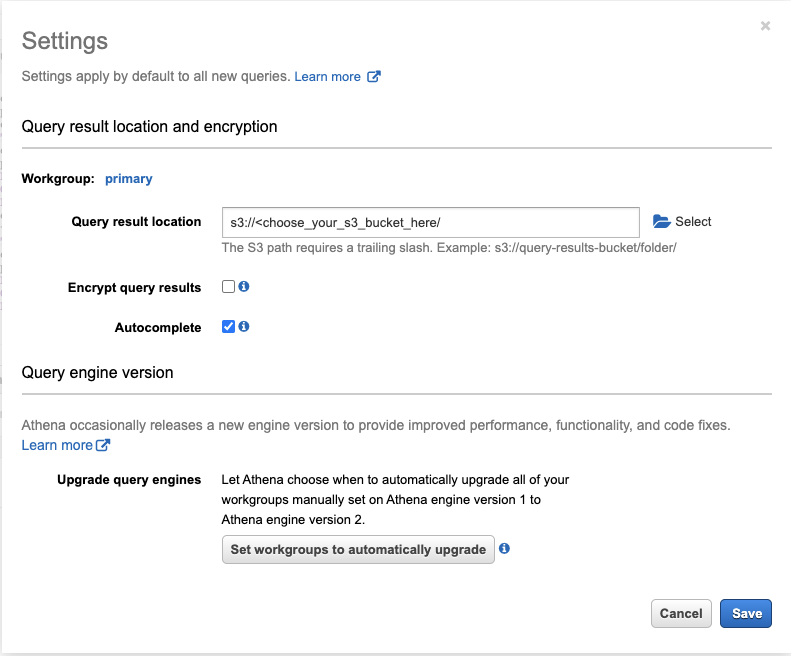
10. Setup an Amazon Athena output S3 bucket by clicking on the “settings” navigation at top right corner, and selecting the second S3 bucket previously created.
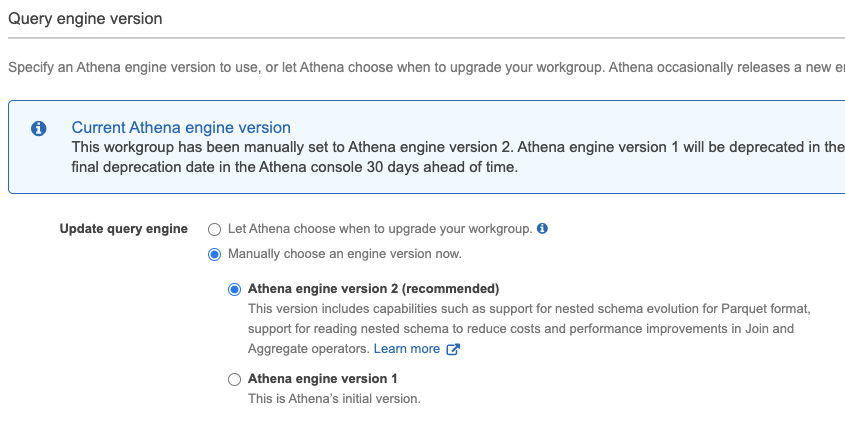
11. A Geospatial Accessor Function, great_circle_distance() which returns the distance between two points on Earth’s surface in kilometers, is available in Amazon Athena Engine version 2. Enable this in your Athena workgroup using the following steps.
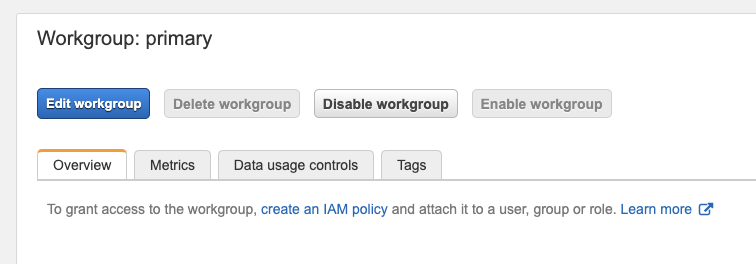
11a. View the Amazon Athena workgroup setting by clicking “workgroup: primary” in the top left navigation links.
11b. Select “primary” workgroup and click “view details.”
11c. Click on “edit workgroup.”
11d. In the “query engine version” section, choose Athena engine version 2.
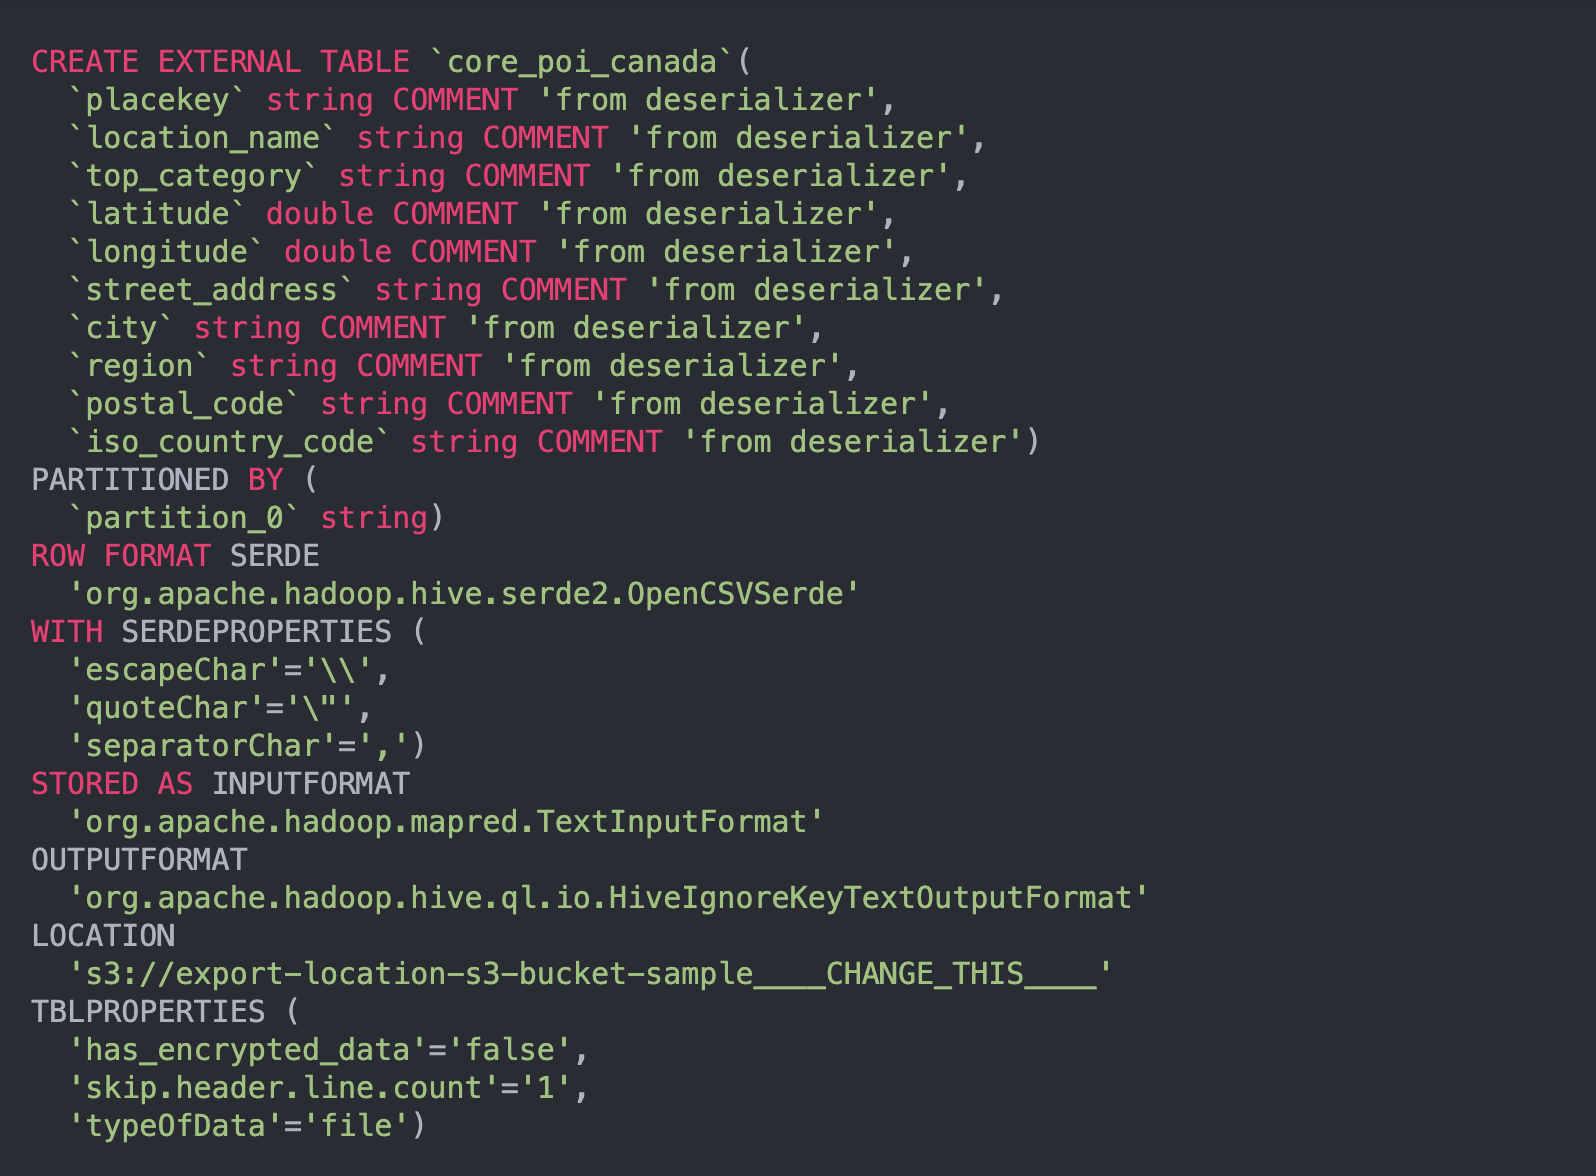
12. Go back to the query editor and execute the following query to create an Athena table based on your S3 bucket files. The following SQL uses core_poi_canada as the table name and refers to export-location-s3-bucket-sample as the S3 bucket. You should change this to your S3 bucket name under “location.”
13. After the table successfully created, you will be asked to load the table partition. You can do so by executing this query in the query editor pane.

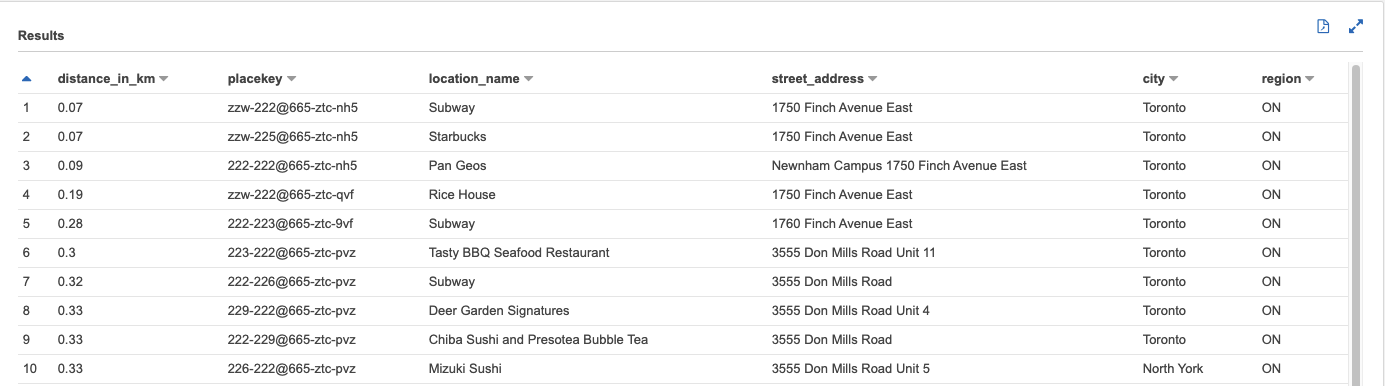
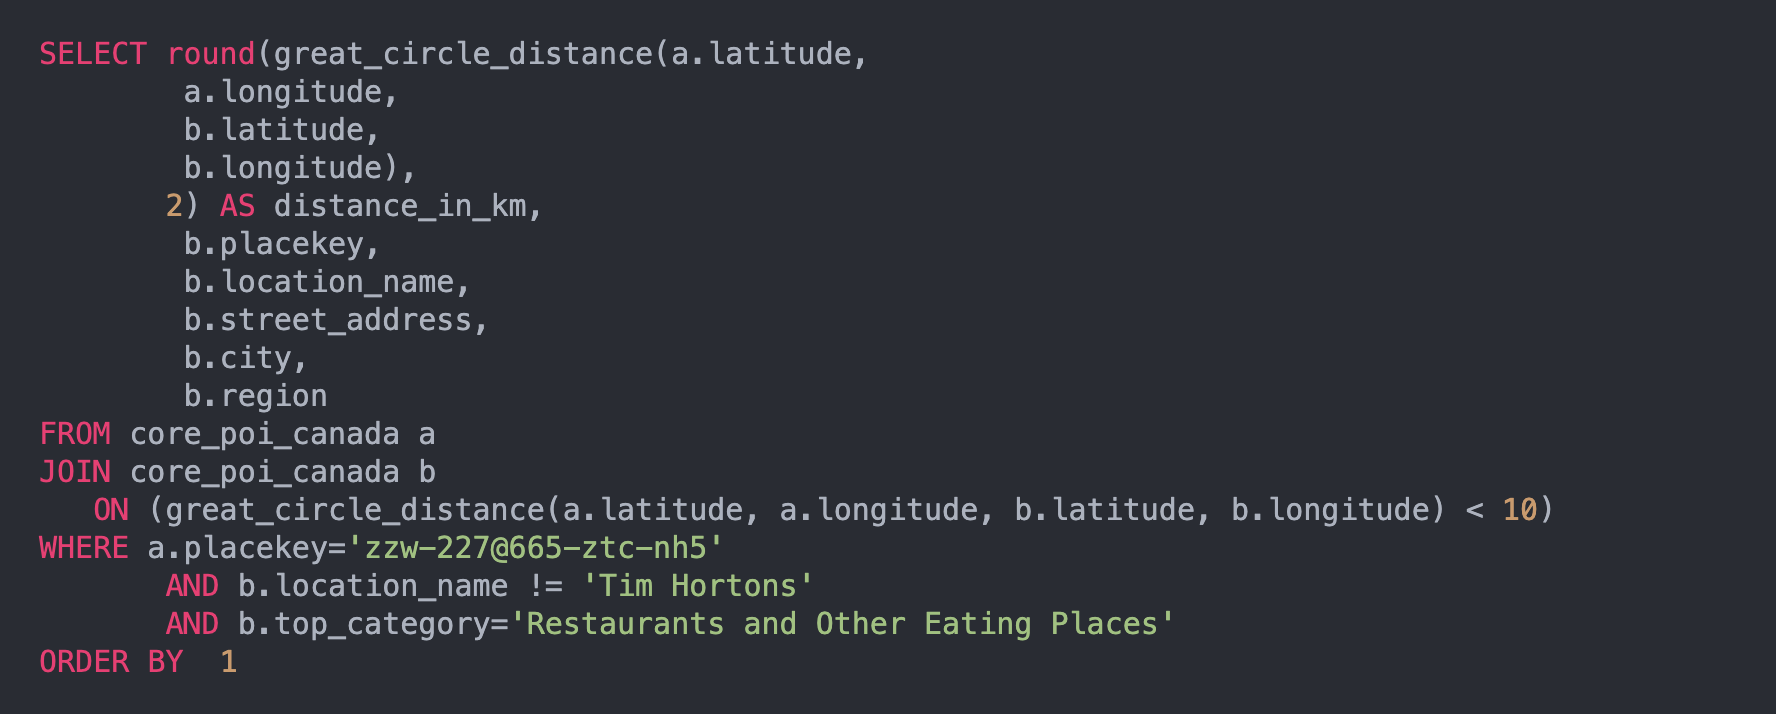
14. You can execute a sample query for determining places where top_category equals “Restaurants and Other Eating Places” within 10KM of a Tim Hortons location at 1750 Finch Avenue East, Toronto, ON (Placekey zzw-227@665-ztc-nh5).
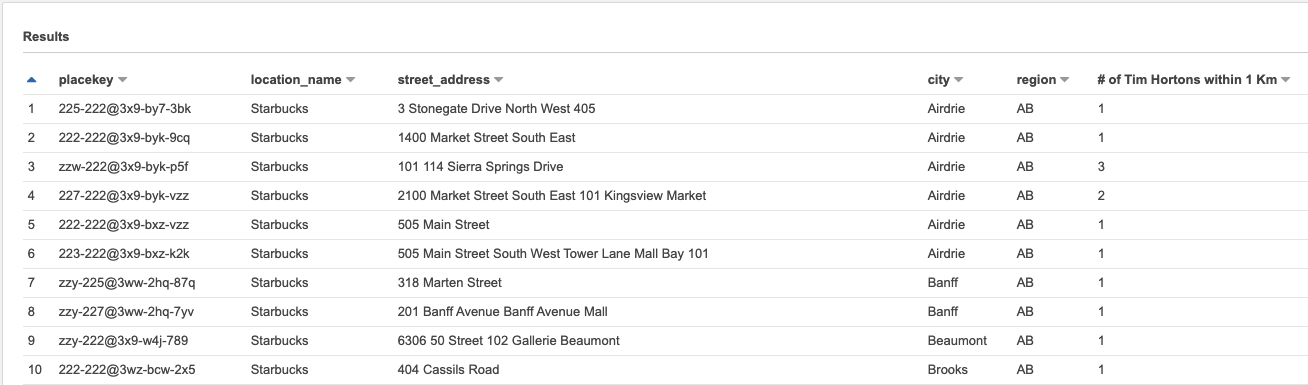
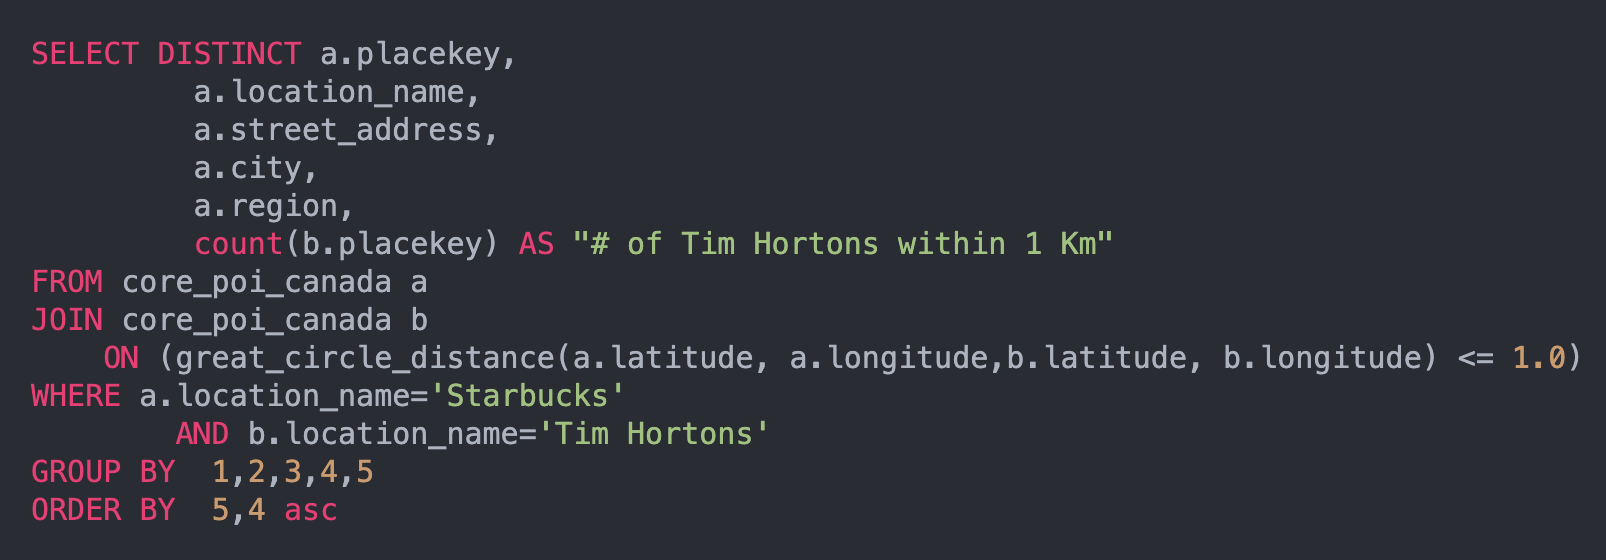
15. You could also run another sample query of selecting the number of Tim Hortons within 1 KM from a particular Starbucks location.
Using an Athena Table as an Amazon Quicksight Data Source
With this data, you can leverage Amazon Quicksight to provide a feature-rich data visualization.
16. Subscribe to Quicksight. For this solution you only need Quicksight Standard Edition.
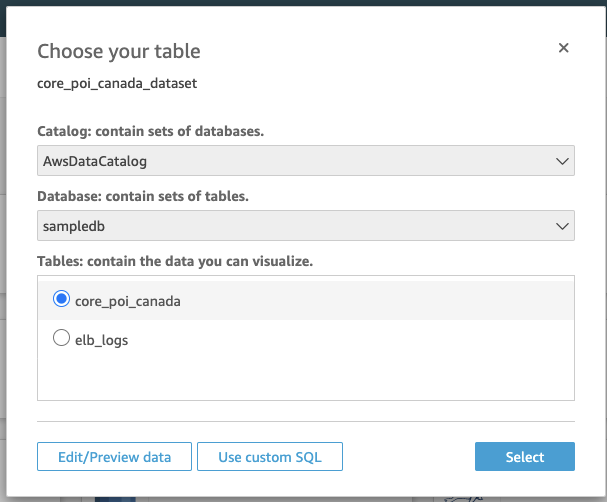
17. Create a new dataset from your Athena table. Click on “datasets” in the left navigation panel, and then the “new dataset” button on the top right of the page.
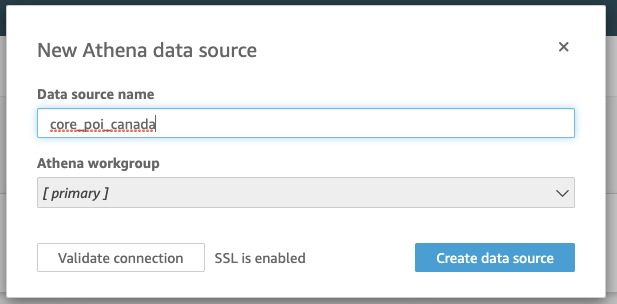
18. Choose “Athena” as your data source, and specify the name which can be different from your Athena table. You will choose the associated Athena table after you click “create data source.”
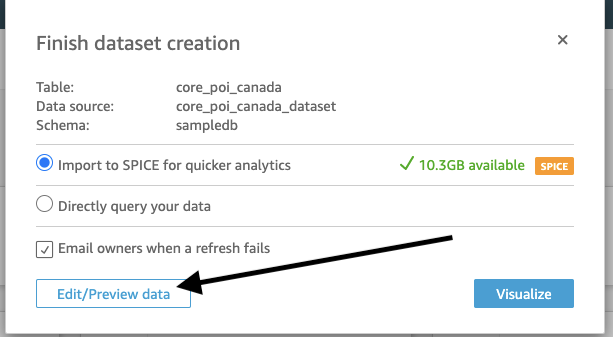
19. When you see “finish dataset creation”, choose “edit/preview data.”
Visualization Using Amazon Quicksight
20. In the dataset preview/edit screen, you can create a field hierarchy for your geospatial visualization.
20a. Click on the three dots on the right side of the “latitude” field, then choose “add to coordinates.”
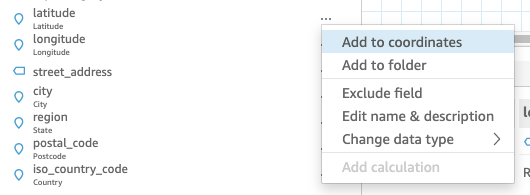
20b. Choose “create a new geospatial coordinates.”
20c. Choose latitude and longitude for each field.
20d. Click “save and visualize” from the top navigation panel.
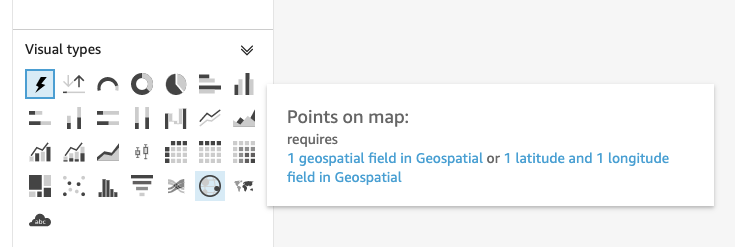
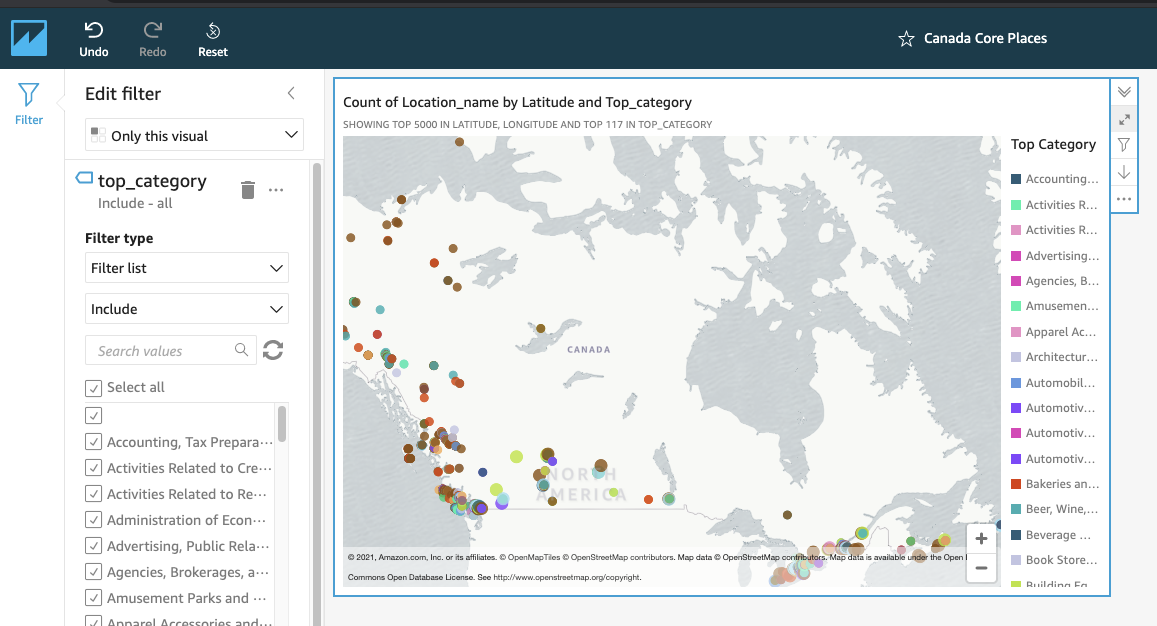
21. From “visual types”, choose “points on map.”
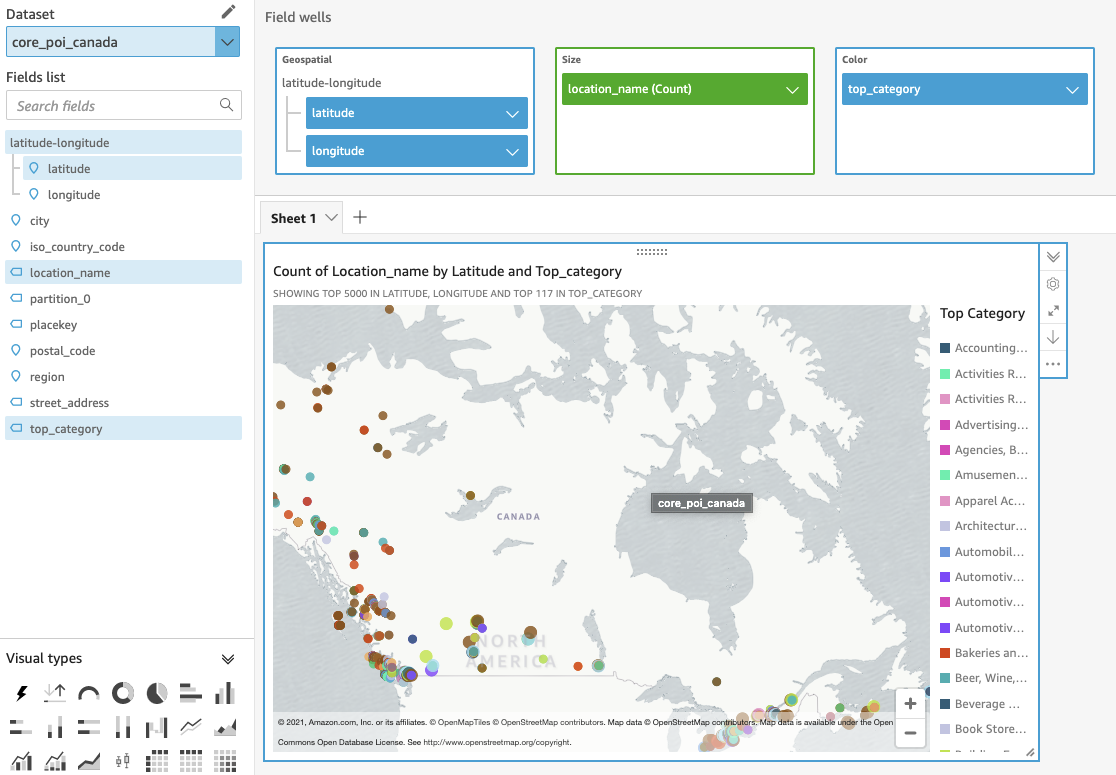
22. Click and drag the following fields to the “field wells” > latitude/longitude to “geospatial”, location_name to “size”, and top_category to “color.”
23. After you finish setting up the visualization you can publish a dashboard by clicking “share” > “publish dashboard.”
24. Specify the name you want for your dashboard, expand “advanced publish options”, and select “enabled ad hoc filtering.”

25. You can interact with the dashboard by adding filters or zooming in and out on the map.
Removing the Data
If you decide to remove all related AWS resources to prevent costs in the future, you can do the following steps. Note: the deletion/removal steps cannot be undone.
1. Unsubscribe from Amazon Quicksight. This will be deleting all Quicksight related content from the account.
1a. Go to your Amazon Quicksight console and click on your profile in top right corner. Choose “manage Quicksight.”
1b. In the left navigation links, choose “account settings”, and click “unsubscribe.”
2. Delete Amazon Athena Table by running this query in your Amazon Athena query editor:

3. Delete your Amazon S3 bucket by selecting the bucket name from the list in your AWS Console – Amazon S3. First click on “empty” then “delete.” You will be asked to confirm several times.